Deliciously Simple: The Ultimate Guide To Rhodes Rolls
There’s nothing quite like biting into a warm, buttery Rhodes roll on a cozy Sunday morning. Whether you’re hosting a dinner party or just craving something comforting, these rolls are the ultimate game-changer. They’re easy to make, incredibly versatile, and guaranteed to impress anyone who tries them. If you’re ready to dive into the world of deliciously simple Rhodes rolls, you’re in the right place.
Let’s be honest—bread is life. And when it comes to bread, Rhodes rolls stand out as the ultimate crowd-pleaser. These soft, pillowy rolls have been a staple in kitchens for decades, and for good reason. They’re perfect for sandwiches, dinner parties, or even just slathering with butter and jam. Plus, they’re so easy to work with that even beginners can master them in no time.
This ultimate guide will take you through everything you need to know about Rhodes rolls. From their history and preparation tips to creative recipes and serving ideas, we’ve got you covered. So grab your apron, preheat the oven, and let’s get started on this bread-filled journey!
Read also:Steve Perry And Kellie Nash A Story Of Love And Music
Table of Contents
- The History of Rhodes Rolls
- Why Choose Rhodes Rolls?
- How to Prepare Rhodes Rolls
- Pro Tips for Perfect Rolls
- Creative Recipes with Rhodes Rolls
- Storing Your Rolls
- Serving Ideas
- Rhodes Rolls vs Other Breads
- FAQs About Rhodes Rolls
- Conclusion
The History of Rhodes Rolls
Before we dive into the nitty-gritty of making and using Rhodes rolls, let’s take a step back and appreciate their rich history. These rolls were first introduced by Don and Betty Rhodes in the 1950s. Back then, they were looking for a way to simplify the bread-making process for busy families. Fast forward to today, and Rhodes rolls have become a household name, beloved by bakers and foodies alike.
What makes Rhodes rolls special is their convenience. They come in pre-portioned dough that’s ready to bake, saving you hours of kneading and rising time. Whether you’re a seasoned pro or a newbie in the kitchen, these rolls are designed to make your life easier—and tastier.
And honestly, who doesn’t love a good origin story? The Rhodes family created these rolls to bring people together over delicious, homemade meals. And that’s exactly what they’ve done for generations.
Why Choose Rhodes Rolls?
Now, you might be wondering, “Why should I choose Rhodes rolls over other bread options?” Great question! Here’s the deal: Rhodes rolls are like the Swiss Army knife of bread. They’re versatile, convenient, and always deliver on flavor.
First off, they’re super easy to use. No need to worry about complicated recipes or special equipment. Just pop them in the oven, and voilà—you’ve got fresh, warm rolls in no time. Plus, they’re perfect for any occasion, from casual family dinners to fancy holiday feasts.
Another reason to love Rhodes rolls is their consistency. Unlike homemade bread, which can sometimes turn out dense or dry, Rhodes rolls are guaranteed to be soft and fluffy every single time. It’s like having a professional baker in your kitchen without all the hassle.
Read also:Delving Into The Soulful Depth Of Rey By Christine Drsquoclario A Musical Journey
Key Benefits of Rhodes Rolls
- Pre-portioned dough for effortless baking
- Perfectly soft and fluffy texture
- Versatile enough for any dish or occasion
- No mess, no stress—just delicious results
How to Prepare Rhodes Rolls
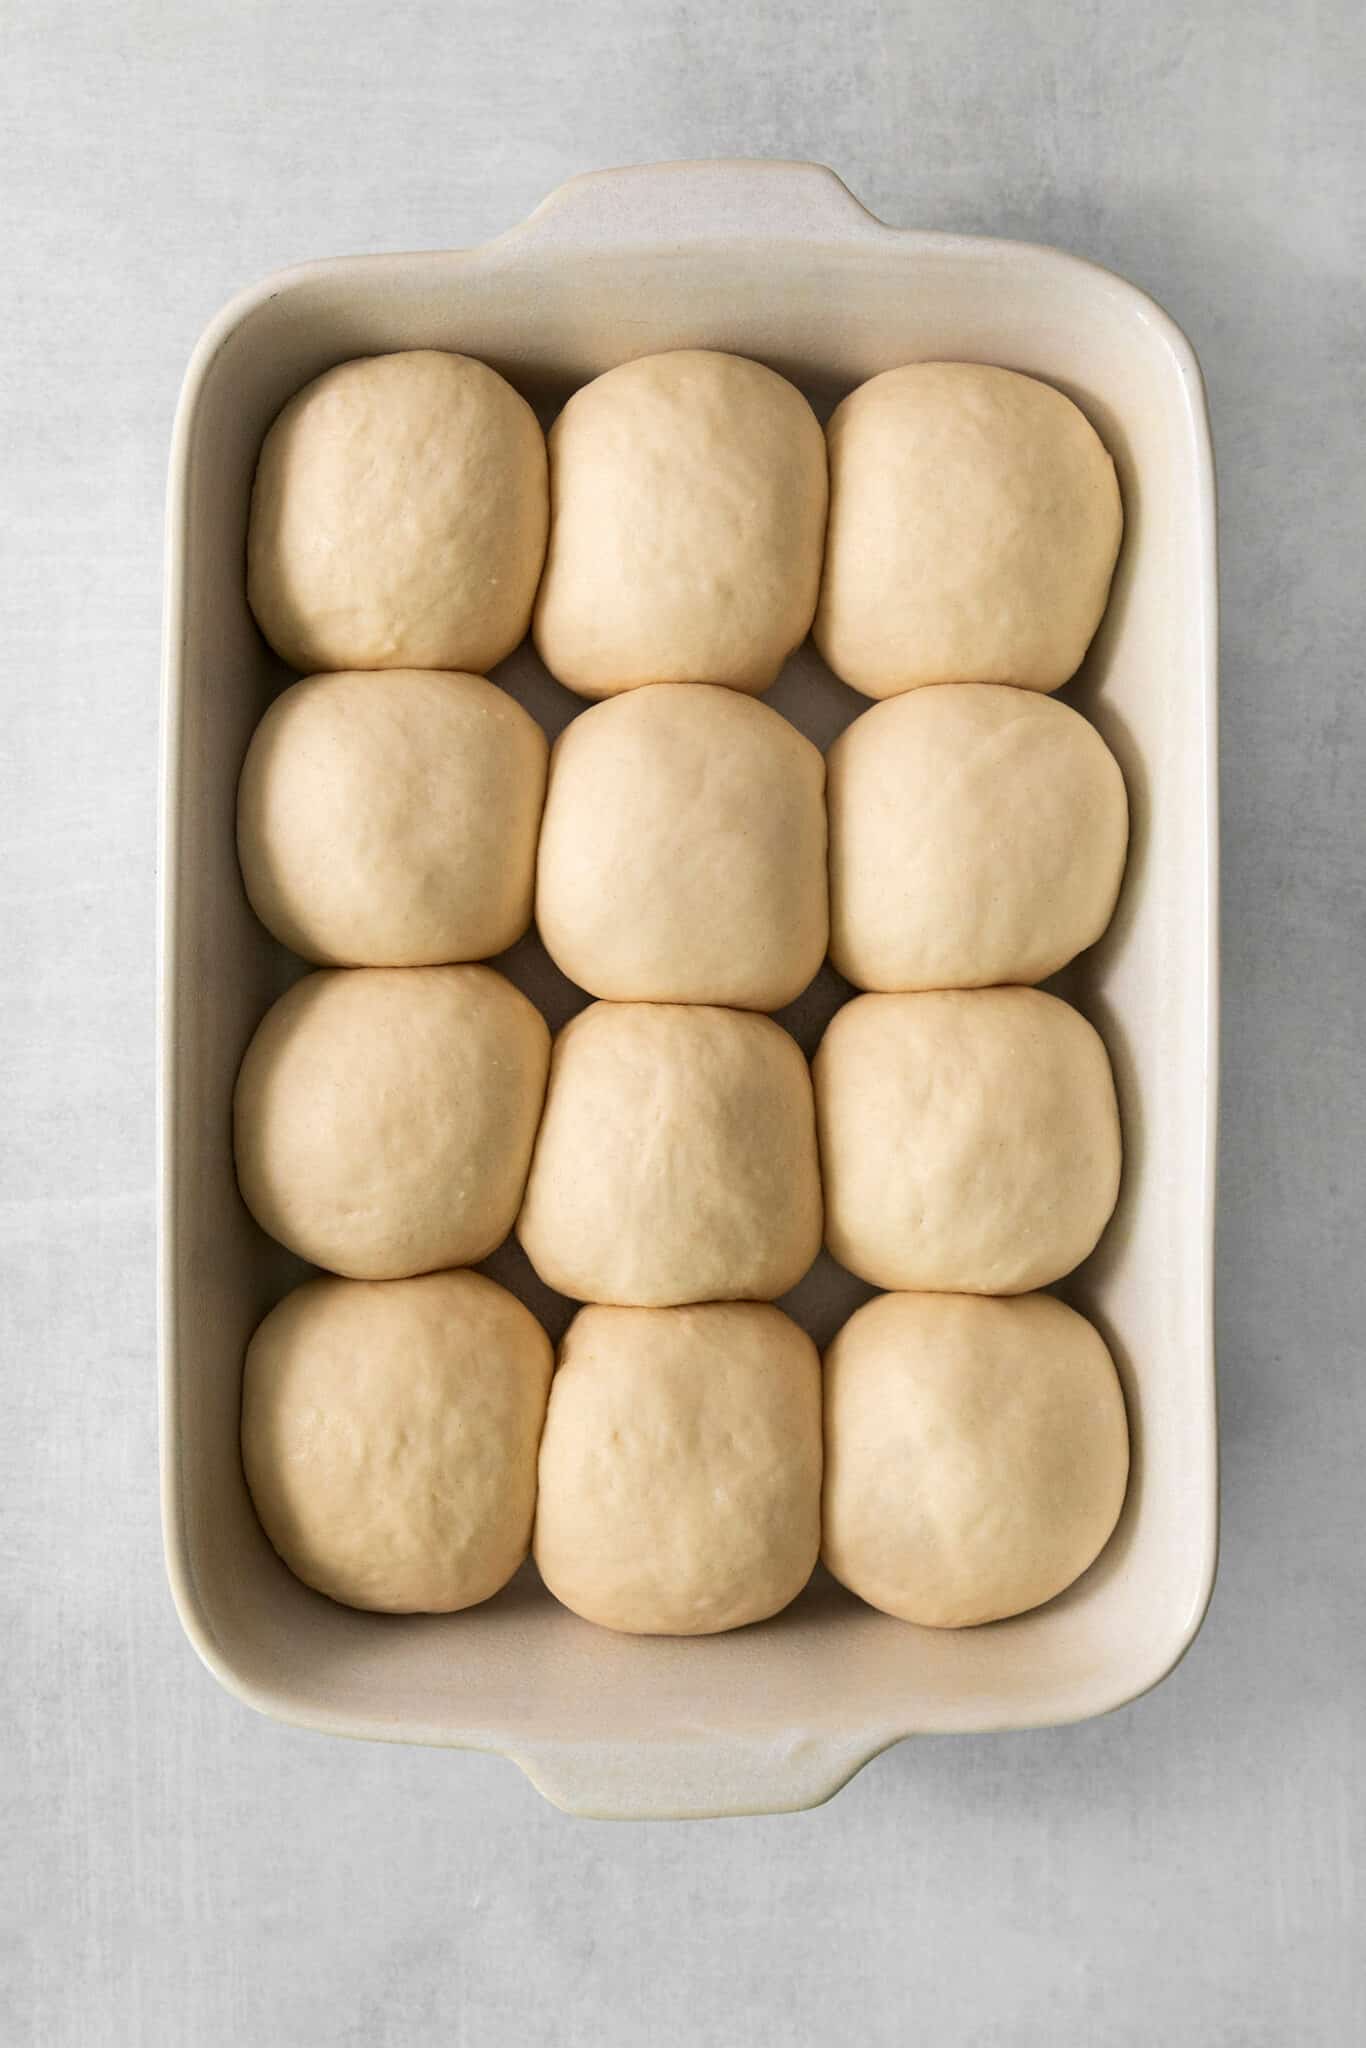
Alright, let’s get down to business. Preparing Rhodes rolls is a breeze, but there are a few steps to follow to ensure they turn out perfectly. First things first: you’ll need your Rhodes rolls dough, a baking sheet, and a bit of time.
Start by preheating your oven to the temperature specified on the package. While your oven is heating up, arrange the rolls on a baking sheet, leaving a little space between each one. This allows them to rise properly as they bake. Next, brush the tops of the rolls with melted butter for that golden, crispy crust we all love.
Finally, pop them in the oven and let the magic happen. Depending on the size of the rolls, they’ll be ready in about 15-20 minutes. When they’re golden brown and smell amazing, they’re done. Easy peasy, right?
Step-by-Step Guide
- Preheat your oven to the recommended temperature
- Arrange the rolls on a baking sheet with space in between
- Brush with melted butter for extra flavor
- Bake until golden brown and enjoy!
Pro Tips for Perfect Rolls
Even though Rhodes rolls are designed to be foolproof, there are a few pro tips that can take your baking game to the next level. Here’s what the experts swear by:
First, don’t overcrowd your baking sheet. While it might seem like a good idea to fit as many rolls as possible, they need room to rise and expand. Trust us, your rolls will thank you for the extra space.
Second, experiment with different toppings. Sure, butter is classic, but why not try garlic butter, herbs, or even a sprinkle of Parmesan cheese? The possibilities are endless, and you might just discover your new favorite flavor combination.
And lastly, store your leftover rolls properly to keep them fresh. We’ll dive more into storage tips later, but for now, just know that a good airtight container is your best friend.
Creative Recipes with Rhodes Rolls
Now that you’ve mastered the basics, it’s time to get creative with your Rhodes rolls. These little gems aren’t just for sandwiches and sides—they can be the star of the show in so many dishes.
1. Mini Pizza Rolls
Who doesn’t love pizza? Transform your Rhodes rolls into mini pizzas by topping them with marinara sauce, mozzarella cheese, and your favorite toppings. Bake them until the cheese is bubbly and enjoy a fun, bite-sized treat.
2. Cinnamon Roll Swirls
Sweet tooth alert! Roll out your Rhodes dough and spread it with a mixture of butter, sugar, and cinnamon. Roll it up, slice it into spirals, and bake until golden. These cinnamon rolls are the perfect breakfast or dessert option.
3. Stuffed Chicken and Rolls
For a more savory option, try stuffing your Rhodes rolls with cooked chicken, spinach, and feta cheese. Bake them until the cheese is melted and the rolls are golden. It’s like a gourmet sandwich in every bite.
Storing Your Rolls
So, you’ve baked up a batch of delicious Rhodes rolls, but you’re not ready to eat them all at once. No problem! Proper storage is key to keeping your rolls fresh and flavorful.
The best way to store Rhodes rolls is in an airtight container at room temperature. This will keep them soft and fresh for a few days. If you need to store them longer, consider freezing them. Simply wrap them tightly in plastic wrap and place them in a freezer-safe bag. When you’re ready to enjoy them, let them thaw at room temperature or reheat them in the oven for a few minutes.
Pro tip: If your rolls start to get a little stale, pop them in the oven for a few minutes to refresh them. It’s like giving them a second wind!
Serving Ideas
Serving Rhodes rolls is almost as fun as baking them. Here are a few ideas to inspire your next meal:
- Make them the centerpiece of a bread basket at your next dinner party
- Use them as buns for gourmet burgers or sandwiches
- Pair them with homemade soup or chili for a comforting meal
- Turn them into sliders for a fun appetizer option
And don’t forget the classics! Butter, jam, or honey are always great choices to complement your rolls. Get creative and see what combinations you come up with.
Rhodes Rolls vs Other Breads
When it comes to bread, there are plenty of options out there. But how do Rhodes rolls stack up against the competition? Let’s break it down:
Compared to traditional homemade bread, Rhodes rolls win in terms of convenience. You get all the flavor and texture of homemade bread without the time and effort. And compared to store-bought bread, Rhodes rolls offer a higher quality product with fewer preservatives.
Of course, there’s always a place for artisanal breads and sourdough, but if you’re looking for something quick and delicious, Rhodes rolls are hard to beat.
FAQs About Rhodes Rolls
Q: Can I freeze Rhodes rolls?
A: Absolutely! Freezing is a great way to preserve your rolls for later. Just make sure to wrap them tightly to prevent freezer burn.
Q: How long do Rhodes rolls last?
A: If stored properly, Rhodes rolls can last for a few days at room temperature. For longer storage, freezing is your best bet.
Q: Can I use Rhodes rolls for gluten-free baking?
A: Unfortunately, Rhodes rolls are not gluten-free. However, there are gluten-free alternatives available on the market if that’s what you’re looking for.
Conclusion
There you have it—the ultimate guide to Rhodes rolls. From their rich history to creative recipes and serving ideas, we’ve covered everything you need to know to make the most of these deliciously simple rolls.
Remember, Rhodes rolls are all about convenience and flavor. Whether you’re a seasoned baker or a kitchen novice, these rolls are a great addition to any meal. So go ahead, experiment, and have fun with them. And don’t forget to share your creations with friends and family—they’re sure to love them as much as you do.
Now it’s your turn! Let us know in the comments how you like to use your Rhodes rolls. And if you enjoyed this guide, be sure to check out our other articles for more kitchen inspiration. Happy baking!


